Whenever we make naan, Jeff says, “I always forget how amazing naan is. I just want to eat the whole batch!” Haha. This recipe is adapted slightly from Aarti at the Food Network, and it’s so delightfully soft and buttery. Her recipe calls for added seeds, but I find that it doesn’t need it. Also, I usually like to double the batch so I can use my whole envelope of yeast (with a little extra added)–then I just freeze the leftovers. When I’m ready to use the frozen leftovers, I just put them in a 350 degree oven for a few minutes, and they’re just as good as fresh made. Make sure to eat the naan hot for the best experience.
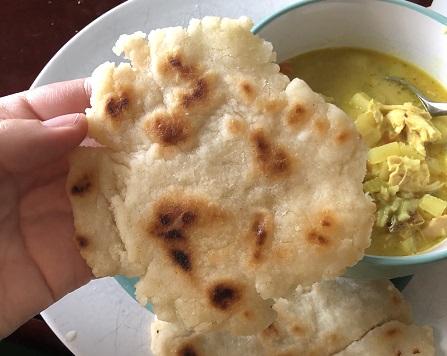
I’ve made these regular and gluten free, and both are amazing. If you’re making these gluten free, just make sure to use gluten free cup for cup flour with a little extra, and some extra baking powder (they included a note in the Food Network recipe, and I’m so grateful). Actually, the original recipe says to use gluten free all-purpose flour with an added 1 1/4 tsp. xanthan gum, but I only had the cup for cup. So I used that with no added xanthan gum and it was just fine. Of course like any gluten free bread dough, it ends up looking more like Play D’oh or frosting than stretchy bread dough. But that’s normal. You don’t need to roll it out with a rolling pin–I just use my hands. The edges are a little more ragged than the regular one and it’s not quite as fluffy, but it’s still amazing and soft. I still don’t think I would’ve known it was gluten free. If you eat the gluten free ones after freezing or letting them cool down, make sure you heat them up very thoroughly or the edges can be almost crunchy. But when they’re fully warm, they’re delightfully soft and chewy. Here’s a picture of the gluten free version:
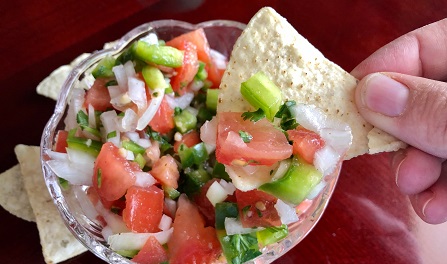
Make it a meal with:
Naan
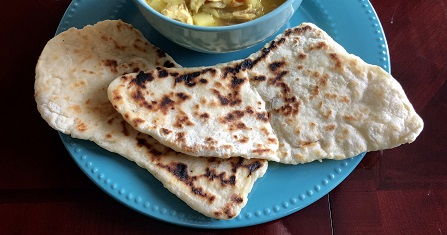
Soft, warm, and buttery–make extra and freeze for later.
Ingredients
-
1 tsp. Yeast
- 3/4 c. Warm Water
-
2 tsp. Sugar
-
2 c. Flour (or 2 1/4 c. gluten free flour with xanthan gum)
-
1 tsp. Salt
-
1/8 tsp. Baking Powder (or rounded 1/8 tsp. for gluten free)
-
3 Tbsp. Plain Yogurt
-
2 Tbsp. Olive Oil
-
Melted butter for slathering on the finished naans
Directions
In a large glass, dissolve the yeast and 1 teaspoon sugar with 3/4 cup warm water (about 100 degrees F). Let it sit on your counter until it’s frothy, about 10 minutes.
Meanwhile, sift the flour, salt, remaining 1 teaspoon of sugar and baking powder into a large, deep bowl.
Once the yeast is frothy, add the yogurt and the olive oil into the glass, and stir to combine. Pour the yogurt mixture into the dry ingredients and gently mix the ingredients together with a fork. When the dough is about to come together, use your hands to mix. It will feel like there isn’t enough flour at first, but keep going until it transforms into a soft, slightly sticky and pliable dough. As soon as it comes together, stop kneading. Cover the dough with plastic wrap, place in a warm area, and let rise for 2 to 4 hours.
When you’re ready to roll, the dough will be extremely soft and sticky. Separate the dough into 6 equal portions and lightly roll each one in extra flour. Using a rolling pin, roll each piece of dough into a teardrop shape, narrower at the top than at the bottom. It should be 8 to 9-inches long, 4-inches wide at its widest point and about 1/4-inch thick. Once you’ve formed the general shape, you can also pick it up by one end and wiggle it; the dough’s own weight will stretch it out a little. Repeat this method with the rest of the dough. (If you’re making them gluten free, just use your hands instead of rolling.)
Heat a heavy pan over high heat, then lay the naan on the skillet. Let it cook and bubble for about 1 minute per side. It should be blistered and somewhat blackened, as is traditional.
Remove the naan from the skillet, brush with butter, and cover with a towel to keep warm. Serve warm.