Granola

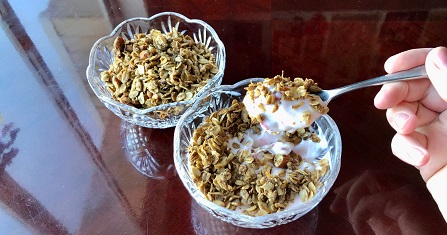
Jeff has talked about his mom making granola as a special treat for Christmas morning when he was little. They would eat it with milk as a cereal, but this can also be a topping for yogurt. This is one of the two granola recipes from his family recipe book, and this one is credited as coming from Make a Mix Cookery 1978. FYI, wheat germ can be hard to find, but recipe substitution sites say you can use ground flax seed. Also, the recipe says to spread in 9×13 pans and bake for 20-25 minutes, but I spread it on a large cookie sheet, and even with more surface area, it took SO much longer than 20 minutes to get any sort of crispness. Like maybe even 38 minutes.

If you’re making this gluten free, make sure to use flax seed instead of wheat germ, use gluten free oats, and check all your bags to make sure they don’t say “May contain wheat.” I was going to make this gluten free so I could try it, but both the Kroger sunflower seeds and flax seeds said they may contain wheat.

Granola

  • Servings: 2 large cookie sheets full
  • Difficulty: easy-medium
  • Print


May take considerably more time to get crisp.

Ingredients

  • 5 c. Rolled Oats (or gluten free oats)

  • 3/4 c. Wheat Germ (or ground flax seed)

  • 1 c. Coconut Flakes

  • 3/4 c. Raw or Toasted Sunflower Seeds

  • 1 1/2 c. Chopped Mixed Nuts

  • 1/2 c. Brown Sugar

  • 3/4 c. Water

  • 3/4 c. Vegetable Oil
  • 1/4 c. Honey
  • 1/4 c. Molasses
  • 3/4 tsp. Salt
  • 1 tsp. Cinnamon
  • 1 1/2 tsp. Vanilla
  • 2 c. Raisins, Chopped Dates, or Other Dried Fruit

Directions

In a large bowl, combine the first 5 ingredients. In a medium saucepan over medium heat, combine brown sugar, water, oil, honey, molasses, salt, cinnamon, and vanilla, stirring until dissolved. Pour over oat mixture and mix well. Spread evenly into ungreased 9×13 baking pans (we used large cookie sheets instead). Bake at 350° for 20-25 minutes, stirring occasionally. (Check for desired crispness–you may need to add a lot more time). Cool completely, then stir in dried fruits. Store in an airtight container.


Tartar Sauce

Tartar sauce is perfect with fish and chips or seafood in general. Tartar sauce varies with a few ingredients from recipe book to recipe book, but this is how we always made it growing up. You can have more or less of any ingredient according to your taste.

And this one is naturally gluten free–just make sure to use either a new container of mayo or one that’s dedicated gluten free so you don’t get crumbs from previous sandwiches.

Make it a meal with:

Tartar Sauce

  • Servings: 6?
  • Difficulty: easy
  • Print


Make in advance to let the flavors meld.

Ingredients

  • 1/2 – 1 Tbsp. Dried Minced Onion
  • 1 Tbsp. Milk
  • 1 c. Mayonnaise
  • 2-3 Tbsp. Sweet Relish

Directions

Place the onion in the bottom of a container or bowl and cover with the milk. Let it absorb for about 5 minutes, then add the remaining ingredients and stir well. Make in advance and let it sit for best flavor.


Cafe Rio Jalapeno Ranch Dressing

This dressing is amazing! And it’s easy because you just throw everything in the blender. It’s great on a sweet pork salad and also inside a sweet pork burrito. I adapted this from a recipe on The Recipe Critic. It often turned out pretty runny and not spicy enough (albeit still delicious), so I made some adjustments. I’m not sure if it’s 100% a Cafe Rio copycat, but I love it. Sometimes 2 jalapenos can be really hot, but I think I’d prefer a little too much heat in the dressing to basically none. Otherwise you might as well make plain ranch.

And this one is naturally gluten free.

Make it a meal with:

Cafe Rio Jalapeno Ranch Dressing

  • Servings: 10?
  • Difficulty: easy
  • Print


Use 2 jalapenos if you want it to have any heat (1 is usually very mild).

Ingredients

  • 1 packet Ranch Dressing Mix
  • 1 c. Mayonnaise
  • 2 Tomatillos, husk removed and cut in chunks
  • 1/2 bunch Fresh Cilantro (discard stems)
  • 1 tsp. Minced Garlic
  • Juice of 1 Lime
  • 1-2 Jalapenos with seeds, cut in chunks (2 if you want any heat)
  • Up to 1 c. Buttermilk for desired consistency (or 1 c. milk + 1 Tbsp. lemon juice) (or just use regular milk)

Directions

Place all ingredients except buttermilk in a blender and pulse until smooth and creamy. Then blend in milk gradually until you reach your desired consistency. Sometimes you won’t need to add much milk at all.


“Disneyland” Cinnamon Rolls

I’ve never had cinnamon rolls at Disneyland, but a friend posted this recipe from magicalrecipes.net and said they were supposed to be like the cinnamon rolls at Disneyland. In any case, they are the best cinnamon rolls I’ve had (albeit time-consuming), and I’ve made them several times (modifying slightly each time). I think the pudding is what makes it so amazingly moist. And you can make them GIGANTIC or slightly larger than normal. It makes two big pans, so I generally freeze leftovers and then reheat them in the microwave–delicious!

Well, before I was diagnosed with celiac, that is. If you’re looking for a gluten free version, I’d probably try a different recipe. I haven’t tried a gluten free cinnamon roll recipe yet, but it will definitely not be as fluffy as these. Sigh. At least they’ll have cream cheese frosting, one of the best things on earth.

Disneyland Cinnamon Rolls

  • Servings: 24?
  • Difficulty: hard
  • Print


Moist, huge, and delicious, but very time-consuming and uses lots of flour

Ingredients

Dough
  • 1/2 c. Warm Water
  • 2 pkgs. Yeast
  • 2 Tbsp. Sugar
  • 1 (3 1/2 oz.) pkg. Instant Vanilla Pudding
  • 2 c. Milk
  • 1/2 c. Butter, melted
  • 2 Eggs, beaten
  • 1 tsp. Salt
  • 8 c. Flour

Filling

  • 1 c. Butter, softened
  • 2 c. Brown Sugar
  • 2 Tbsp. Cinnamon
Cream Cheese Frosting
  • 1 8-oz. pkg. Cream Cheese, softened
  • 1/2 c. Butter, softened
  • 1 tsp. Vanilla
  • 3 c. Powdered Sugar
  • 2 Tbsp. Milk

Directions

For the dough, in a small bowl, combine water, yeast, and sugar and stir until dissolved. Set aside. In large bowl, mix pudding according to package instructions with milk. To this add 1/2 cup melted butter, egg, and salt. Mix well, then add yeast mixture and blend well. Gradually add flour and knead until smooth. Place in a very large greased bowl. Cover and let rise in a warm place until double in size.

Punch down and let rise again for a second time.

Roll dough on a very large floured surface. Dough should roll out to a long rectangle, about 34 x 21 inches in size.

For filling, spread the soft butter over the dough. In small bowl, mix together the brown sugar and cinnamon, then sprinkle over the buttered dough. Roll dough up tightly like a jelly roll.

Measure dough every 2 inches and cut with a knife or dental floss. Take each roll into the palm of your hand and gently pack the roll (this keeps it from coming apart during baking). Place each roll in a buttered baking pan and allow to rise in a warm place for about 20 minutes.

Bake at 350° until golden brown, about 15-20 minutes.

For cream cheese frosting, combine all ingredients in mixing bowl and mix until smooth. Spread on slightly warm rolls.


GF Pizza Crust

For basically every recipe, I prefer to have a gluten free version of the regular one. But pizza crust is just so different. Gluten is so integral to that stretchy, elastic dough. So I searched out a gluten free version. With gluten free, you basically always get a dough that looks more like Play D’oh or frosting, then you spread it out on parchment paper. I found this recipe on glutenfreepalate.com and am posting it here (slightly modified) so I don’t have to scroll through tons of pages of text and ads (and because I don’t make any money off this blog–it’s just so I have an electronic version of my own recipe book). If you’d like more details and pictures, make sure to visit their website.

In any event, this recipe is great because you don’t need to wait for it to rise. You can also bake a crust and freeze it to top later. Of course you don’t get fluffy, airy crusts, but it’s easy, chewy, and delicious, and you can make it as thick as you want. That’s one of the things about gluten free crusts–a lot of restaurants use the Udi’s crust, which is fine but thin–more like a really thick tortilla. So it’s refreshing to make it thicker. Here’s a picture of the thickness that I make (the black specks are extra basil on top):

Here’s an even thicker one:

Make it a meal with:

  • Green Salad
  • Root Beer

Gluten Free Pizza Crust

  • Servings: 1 pizza
  • Difficulty: easy-medium
  • Print


Chewy, easy, and delightful.

Ingredients

  • 3/4 c. Warm Water
  • 1 Tbsp. Sugar

  • 1 pkg. Yeast
  • 2 c. Gluten Free Flour with Xanthan Gum (like Bob’s Red Mill cup for cup)

  • 1 tsp. Salt

  • 1 Egg
  • 1 Tbsp. Olive Oil

  • 1 tsp. Vinegar

Directions

Place a pizza stone in the oven and preheat to 450°. In the bowl of a stand mixer, place water, sugar, and yeast, and let it sit for about 5 minutes or until it’s foamy. (Note: For measuring gluten free flour, always spoon into the measuring cup and level off with a knife instead of scooping out with the measuring cup.) Add the rest of the ingredients and mix with the paddle attachment on low speed for 1 minute. Using an oiled spatula, scrape the dough onto a sheet of parchment paper and use oiled hands to spread into your desired size and shape (about 10-12″). Place the parchment on the pizza stone and bake for 10 minutes or until slightly golden brown. Carefully remove from oven with the paper (remember parchment can get brittle and break easily after baking), then add toppings, return with paper to the stone, and bake for another 10-15 minutes until golden brown.


Naan (Regular or GF)

Whenever we make naan, Jeff says, “I always forget how amazing naan is. I just want to eat the whole batch!” Haha. This recipe is adapted slightly from Aarti at the Food Network, and it’s so delightfully soft and buttery. Her recipe calls for added seeds, but I find that it doesn’t need it. Also, I usually like to double the batch so I can use my whole envelope of yeast (with a little extra added)–then I just freeze the leftovers. When I’m ready to use the frozen leftovers, I just put them in a 350 degree oven for a few minutes, and they’re just as good as fresh made. Make sure to eat the naan hot for the best experience.

I’ve made these regular and gluten free, and both are amazing. If you’re making these gluten free, just make sure to use gluten free cup for cup flour with a little extra, and some extra baking powder (they included a note in the Food Network recipe, and I’m so grateful). Actually, the original recipe says to use gluten free all-purpose flour with an added 1 1/4 tsp. xanthan gum, but I only had the cup for cup. So I used that with no added xanthan gum and it was just fine. Of course like any gluten free bread dough, it ends up looking more like Play D’oh or frosting than stretchy bread dough. But that’s normal. You don’t need to roll it out with a rolling pin–I just use my hands. The edges are a little more ragged than the regular one and it’s not quite as fluffy, but it’s still amazing and soft. I still don’t think I would’ve known it was gluten free. If you eat the gluten free ones after freezing or letting them cool down, make sure you heat them up very thoroughly or the edges can be almost crunchy. But when they’re fully warm, they’re delightfully soft and chewy. Here’s a picture of the gluten free version:

Make it a meal with:

Naan

  • Servings: 6
  • Difficulty: medium
  • Print


Soft, warm, and buttery–make extra and freeze for later.

Ingredients

  • 1 tsp. Yeast

  • 3/4 c. Warm Water
  • 2 tsp. Sugar

  • 2 c. Flour (or 2 1/4 c. gluten free flour with xanthan gum)

  • 1 tsp. Salt

  • 1/8 tsp. Baking Powder (or rounded 1/8 tsp. for gluten free)

  • 3 Tbsp. Plain Yogurt

  • 2 Tbsp. Olive Oil

  • Melted butter for slathering on the finished naans

Directions

In a large glass, dissolve the yeast and 1 teaspoon sugar with 3/4 cup warm water (about 100 degrees F). Let it sit on your counter until it’s frothy, about 10 minutes.

Meanwhile, sift the flour, salt, remaining 1 teaspoon of sugar and baking powder into a large, deep bowl.

Once the yeast is frothy, add the yogurt and the olive oil into the glass, and stir to combine. Pour the yogurt mixture into the dry ingredients and gently mix the ingredients together with a fork. When the dough is about to come together, use your hands to mix. It will feel like there isn’t enough flour at first, but keep going until it transforms into a soft, slightly sticky and pliable dough. As soon as it comes together, stop kneading. Cover the dough with plastic wrap, place in a warm area, and let rise for 2 to 4 hours.

When you’re ready to roll, the dough will be extremely soft and sticky. Separate the dough into 6 equal portions and lightly roll each one in extra flour. Using a rolling pin, roll each piece of dough into a teardrop shape, narrower at the top than at the bottom. It should be 8 to 9-inches long, 4-inches wide at its widest point and about 1/4-inch thick. Once you’ve formed the general shape, you can also pick it up by one end and wiggle it; the dough’s own weight will stretch it out a little. Repeat this method with the rest of the dough. (If you’re making them gluten free, just use your hands instead of rolling.)

Heat a heavy pan over high heat, then lay the naan on the skillet. Let it cook and bubble for about 1 minute per side. It should be blistered and somewhat blackened, as is traditional. 

Remove the naan from the skillet, brush with butter, and cover with a towel to keep warm. Serve warm.


Bread Mix Bags

My mom used to make these bread mix bags all the time and keep them ready for breadsticks at a moment’s notice. I even took some to college with me. They were very handy. Man, I love those warm breadsticks, especially with butter spread on top. Although, it is rather annoying that you have to add gluten and dough enhancer as part of the recipe. And I will say that last time I made the bags, it didn’t seem like it was enough yeast. I think I’d just add a whole packet of yeast (which is about 2 1/4 tsp. if I remember correctly).

And I wouldn’t try making this gluten free. Haha, especially since it specifically calls for adding gluten.

Make it a meal with:

Bread Mix Bags

  • Servings: 12?
  • Difficulty: easy
  • Print


All the dry ingredients are ready to go, for an easy bread.

Ingredients

  • 3 c. White Flour (may use 1 c. wheat for white)
  • 1-2 Tbsp. Powdered Milk
  • 1 ½ Tbsp. Sugar
  • ¾ tsp. Salt
  • 1 heaping Tbsp. Gluten
  • 1 heaping Tbsp. Dough Enhancer

Add these when ready to use:

  • 1 c. 2 Tbsp. Warm Water
  • 1 Tbsp. Butter
  • 1 ½+ tsp. Yeast

Directions

For the bread mix bag, combine the ingredients in a plastic bag, then store in a cool, dry place.

When ready to use: Place water, butter, and yeast in mixer. Add contents of bag. Mix on low speed with dough hook for 8 minutes. Let rise 1 hour and form in loaves, breadsticks (12 to 16), rolls, pizza dough, cinnamon rolls. Breadsticks: 400° for 10 minutes. Bread: 375° for 30 minutes (about).


Red Lobster Biscuits

Of course there are also mixes for Red Lobster’s Cheddar Bay Biscuits, but here’s a recipe that just uses Bisquick. And since they’re like the ones from Red Lobster, these are great with seafood. Make sure to eat them when they’re hot.

I haven’t tried making this one gluten free yet, but I do have a gluten free mix that I’m looking forward to using. And there is a gluten free Bisquick mix that you could try.

Make it a meal with:

Red Lobster Biscuits

  • Servings: 12?
  • Difficulty: medium
  • Print


Buttery, garlicky, and great with seafood.

Ingredients

  • 2 c. Bisquick (or gluten free Bisquick mix)
  • 2/3 c. Milk
  • ½ c. Shredded Cheddar Cheese
  • ½ c. Butter, melted
  • ¼+ tsp. Garlic Powder

Directions

Heat oven to 450°. Mix Bisquick, milk and cheese until a soft dough forms. Drop by spoonfuls onto an ungreased cooking sheet. Bake 8-10 minutes until golden brown. Mix butter and garlic powder. Brush mixture over warm biscuits before removing from cookie sheet.


The Best Banana Bread

Jeff got this recipe from his friend Adam’s mom, and it really is the best banana bread. What makes it so amazing? Man, it is SO buttery! We’ve made this bread for so many people, and it’s just delicious. Note that it does often sink in the middle–but it’s still amazing. And it’s a great use of your overripe bananas. If you want it to sink less, make it in smaller pans or as banana muffins. We might play with the recipe a little bit to see if we can get it to sink less, but it’s so delicious that we don’t mind if it’s a bit sunken.

(When I made it for the picture, of course it overflowed a lot in the oven, so the shape of the slice was kind of weird. But I wanted to photograph it so you know this loaf isn’t perfectly rectangular, at least not until we figure out a better option for keeping it from overflowing/sinking.)

If you’re making it gluten free, just swap the flour for the gluten free cup for cup flour and add 1/4 c. It turns out really well–I don’t think I could tell the difference, they even look the same.

The Best Banana Bread

  • Servings: 1 lg loaf or 2 small
  • Difficulty: medium
  • Print


Buttery and amazing (may sink in the middle).

Ingredients

  • 1 3/4 c. Sugar
  • 3/4 c. Butter
  • 2 Eggs
  • 2 c. Flour (or 2 1/4 c. gluten free flour with xanthan gum)
  • 1/2 tsp. Salt
  • 1 tsp. Baking Powder
  • 1 tsp. Baking Soda
  • 1/4 c. Buttermilk (or 1/4 c. milk mixed with 1 Tbsp. vinegar or lemon juice)
  • 1 c. Mashed Very Ripe Bananas (2 bananas)

Directions

Mix all ingredients together. Pour batter into buttered pans and place pans on a cookie sheet in case of overflow (be careful not to overfill–even large loaves can bubble over). Bake at 325° for at least 1 hour (until an inserted knife comes out clean). Makes 2-3 small loaves or 1 extra large loaf.