Diana’s Popcorn

We don’t make this one too often. This popcorn is kind of a variation of caramel corn–like a sweet and salty caramel corn mixed with Rice Krispie Treats. But it’s chewy, not crunchy. You’ll probably want to eat this one while it’s warm because it does tend to clump together when it’s cold and then it gets hard to eat. Also make sure to choose a microwave popcorn that you like to eat by itself, because you can taste the popcorn.

And this one is naturally gluten free.

Diana's Popcorn

  • Servings: 8?
  • Difficulty: easy
  • Print


Like a chewy, sweet and salty caramel corn. Best eaten warm.

Ingredients

  • 2 bags Microwave Popcorn, popped
  • 1/2 c. Butter
  • 1 c. Brown Sugar
  • 14-18 large Marshmallows

Directions

In glass bowl, microwave butter 1 minute. Stir in brown sugar, microwave 1 minute. Stir in marshmallows, microwave 1 minute. Stir well and pour over popcorn, and mix well.


Crunchy Classic Caramel Corn

If you’re looking for a classic, fully crunchy, perfect caramel corn, this one will take you back to memories of the fair, with sweet aromas in the air. This is adapted from a Karo recipe, and it does take a fair amount of time–but the time in the oven helps makes it nice and crunchy instead of chewy, like you often get with quick caramel corn. If you’re looking for a quick caramel corn instead, try this one

If you don’t have Silpats, you can also try spraying the pan or aluminum foil with cooking spray. Also, you can try adding mix ins, but you may want to increase the caramel. I’ve made it with 2 c. of pecans before, and it was delightful. You don’t even need to toast the pecans beforehand because they toast in the oven with the popcorn–and they’re reminiscent of delicious pecan pie.

And luckily this one is naturally gluten free. Just make sure you don’t use silpats that were used previously with gluten.

Crunchy Classic Caramel Corn

  • Servings: 8
  • Difficulty: medium
  • Print


Takes longer to make, but it’s so crunchy and delightful.

Ingredients

  • 4 qt. Popped Popcorn
  • 1 c. Brown Sugar
  • 1/2 c. White Corn Syrup
  • 1/2 c. Butter
  • 1/2 tsp. Salt
  • 1/2 tsp. Baking Soda
  • 1 tsp. Vanilla
  • Pecan halves (up to 2 c.) (optional)

Directions

Place Silpats on 2 cookie sheets. Place popcorn on the 2 sheets and place in a 250° oven. In a saucepan, combine sugar, butter, syrup, and salt, and boil for 5 minutes without stirring. Remove from heat and add baking soda and vanilla. Pour over warm popcorn, stir to coat, and bake for 45 minutes, stirring every 15 minutes. Cool, then break apart.


Microwave Caramel Corn

We made this with our mom quite a few times when we were little. It’s pretty fast and easy, but it doesn’t always get 100% crispy–sometimes it can be a little chewy, which some people enjoy. If you’re looking for totally crunchy caramel corn, try this recipe for Crunchy Classic Caramel Corn (but it does take much more time).

And luckily this one is naturally gluten free.

Microwave Caramel Corn

  • Servings: 8?
  • Difficulty: easy-medium
  • Print


Very fast and easy (sometimes chewy).

Ingredients

  • 15 c. unsalted popped Popcorn (about 2 batches from popcorn blower)
  • 1 large Paper Bag
  • ½ c. Butter
  • 1 c. Brown Sugar
  • 1/4 c. White Corn Syrup
  • ½ tsp. Baking Soda

Directions

Pop first batch of popcorn and place in paper bag (remove unpopped kernels). In large glass cup, microwave sugar, butter, and corn syrup for 1 ½ minutes to melt. Stir in baking soda. Pour ½ the liquid over popcorn. Close bag and shake. Pop second batch of popcorn and place in bag. Pour remaining liquid on top, then close bag and shake well. Microwave bag for 1 ½ minutes. Be careful not to overcook because it can burn. Shake bag again and cool before eating.


Caramels

These caramels are a Christmas tradition every year in my house, and we often give them to neighbors as a gift. In my mom’s recipe box, this was labeled “Never Fail Caramels” because unlike regular finicky caramels, these ones aren’t difficult to make. Plus, the recipe is VERY simple–just the same amount of every ingredient.

I wouldn’t say these caramels NEVER have any issues, because you do have to stir pretty well or you’ll end up with brown specks in your caramel. That’s pretty common for any dairy-based food, though, that it tends to brown on the bottom of the pan. But it always tastes delicious and doesn’t separate or turn grainy like traditional caramels often do with the slightest change in humidity. If you do find brown spots in your caramel, you can easily pour it through a sieve as you pour onto the cookie sheet. Just be careful of your hands because the caramel is boiling hot.

*Tip: Use the ice water method to test for your desired texture. One time we poured the caramel out too early even though we thought it had reached the correct temperature, and it was far too soft after we let it sit overnight. So we put the caramel back in the pan with a tiny bit of water, then brought it back up to the right temperature. And we had a bowl of ice water on hand. Then we’d drop a tiny ball of caramel into it, and once it had cooled for a few seconds to room temperature, we’d take a bite to see if it was firm enough without getting crunchy. We’ve also done this when the caramel turned out too hard–reheated it with a little water to the correct temperature and then tested it with ice water. It did come out softer the second time. Haha, we call the redo caramels “Repentance Caramels”–a good reminder that you’re never too far gone to come back and be great.

And luckily this one is naturally gluten free.

Caramels

  • Servings: one large cookie sheet
  • Difficulty: medium
  • Print


“Never fail” and easier than regular caramels.

Ingredients

2 c. or equal of all ingredients:

  • Sweetened Condensed Milk
  • White Corn Syrup
  • Butter
  • Brown Sugar
  • White Sugar

Directions

Butter a cookie sheet and place on a large pot holder. Place all ingredients in a heavy pan, then turn the heat to medium-low and stir constantly or it may leave chunks or specks. Cook to between soft and firm ball stage (242° at sea level, 232° at high altitude). Stir very well near the end, scraping the bottom of the pan because it tends to brown. (Tip: Use ice water method to test for desired texture, dropping a small ball of hot caramel into a bowl of ice water, then taking out and testing texture with your fingers and your mouth.) Once you’ve reached the desired texture, pour onto buttered cookie sheet and leave on level surface undisturbed for 12-14 hours. Cut into small squares and wrap in waxed paper.


Apple Crumb Pie

It isn’t Thanksgiving without apple pie. And for those of us who prefer their pie topped with sweet crumbles instead of dry pie crust, this is the winner. We make this every year the night before Thanksgiving, sometimes even making two pies. Just make sure to test your apples so they’re done to your level of preferred softness. This recipe is adapted from the famous Better Homes and Gardens red checked cookbook. That thing is full of lots of great recipes!

Also, of course apples vary in size. So I like to cut apples one at a time and place them in the pie crust before mixing with anything, just so I can make sure it’ll fit. It seems like a waste of apples if you cut them all only to find that they won’t all fit.

I haven’t made this one gluten free yet, but it should be easy enough to switch out gluten free flour (and make sure you use a gluten free pie crust). Or if you don’t want to bother with a gluten free pie crust, you can always opt to make gluten free apple crisp.

Apple Crumb Pie

  • Servings: 8
  • Difficulty: medium
  • Print


Sweet and perfect for Thanksgiving.

Ingredients

  • 2/3 c. Sugar
  • 2 Tbsp. Flour (or gluten free flour)
  • ¾ tsp. Cinnamon
  • 6 to 8 tart Apples, pared, cored, and sliced (6 cups)
  • 1 9-inch unbaked Pie Crust (or gluten free pie crust)
  • ½ c. Flour (or gluten free flour)
  • ¼ c. Sugar
  • ¼ c. Butter (usually use 6 Tbsp. butter for larger crumbles)

Directions

Combine first three ingredients; stir into apples. Then place in pie crust. Combine remaining flour and sugar; cut in butter till crumbly. Sprinkle the mixture over apples. Bake at 400° for 45-50 minutes or till done. If pie browns too quickly, cover edge with foil.


Easy Chicken and Rice Soup

Great for cold weather or when your stomach is upset, especially if you need something gluten free. This is adapted from a great recipe on twopeasandtheirpod.com

And as previously mentioned, this one is naturally gluten free.

Make it a meal with:

Easy Chicken and Rice Soup

  • Servings: 4
  • Difficulty: easy-medium
  • Print


Mild and great for cold weather or upset stomachs.

Ingredients

  • 1 Tbsp. Olive Oil
  • 1 Onion, chopped
  • 2 Garlic Cloves, minced (abt. 1 tsp. minced)
  • 2 medium Carrots, chopped
  • 2 Celery ribs, cut into 1/2-inch-thick slices
  • 1 tsp. + Dried Thyme Leaves
  • 1 Bay Leaf
  • 2 qts. Chicken Stock or Broth (I often just do 3 Tbsp. chicken base and 9 cups water)
  • 1 c. Water
  • 1/2 c. Rice, uncooked
  • 2 c. Shredded Cooked Chicken (can use about 1/2 rotisserie chicken)
  • Salt and Pepper to taste

Directions

Place a large pot over medium heat and add the olive oil. Add the onion, garlic, carrots, celery, thyme and bay leaf. Cook and stir for about 6 minutes, until the vegetables are softened but not browned. Pour in the chicken broth and water and bring to a boil. Add the rice and chicken; season with salt and pepper.
Cook on medium-low until the rice is tender, about 25-30 minutes.


Jalapeno Cheddar Soup

This is another decadent cream-based soup based on a Harmons deli soup recipe. It makes quite a lot. (Check out the tomato basil soup also.) I’m so glad the deli director at Harmons was always happy to share any recipe you’d ask for, because everything that Harmons makes is so amazing. Anyway, at the hot soup bar, you can find their turkey cheddar jalapeno soup. I adapted it to use chicken (cheaper and more convenient), cut the broth in half, and I also added more ingredients so it wasn’t so much broth in relation to chicken. It also calls for a lot of butter–I feel like I cut it in half the last time I made it (to 1/2 c.), and it was good.

This soup is great, spicy, and best with chips and cheese on top. Depending on how spicy it turns out, you may need to add sour cream. This is another soup where we freeze the leftovers in gallon bags–sometimes the potatoes can get a little mushier after thawing, but mostly it heats up and tastes just fine. And this soup still has a thin broth instead of a thick gravy like a stew–so I put cheddar and sour cream on top of the soup for the picture, and of course they both just sank right in. Haha. 

If you’re making this gluten free, make your roux with the cornstarch instead of flour.

Make it a meal with:

  • Corn Muffins
  • Tortilla Chips
  • Grapes

Jalapeno Cheddar Soup

  • Servings: 15?
  • Difficulty: medium-hard
  • Print


Spicy and delicious–you can freeze leftovers in gallon bags.

Ingredients

  • 1 c. Butter (or 1/2 c. for less oil on top of the soup)
  • 1/2 c. Flour (or 1/4 c. cornstarch)
  • 6.5 lb. Chicken Breasts, cubed
  • 1/4 c. Canola Oil
  • 1 Onion (.6 lb.)
  • 2 Tbsp. Minced Garlic
  • 1 Red Pepper (3.25 oz.), diced
  • 1 Green Pepper, diced
  • 1 Jalapeno (1 oz.), diced
  • 1/4 c. Water
  • 1 oz. (about 1+ Tbsp) Member’s Mark Chicken Base
  • 1/2 gal. Chicken Stock (2 boxes)
  • 1 qt. Cream
  • 2 qt. Milk (8 cups)
  • 1/2 Tbsp. Salt
  • 1 tsp. Black Pepper
  • 1/2 Tbsp. Red Pepper Flakes
  • 3 large potatoes, peeled and diced  
  • 1 lb. sharp or extra sharp cheddar, grated
  • 1/2 bag Frozen Corn

Directions

In a separate pan from the stock pot, create the roux by melting the butter and adding the flour or cornstarch to cook. In the large stock pot, brown the chicken. Add oil, onion, garlic, peppers, and jalapeno and cook until onion is translucent. Add water, stock, base, cream, and milk. Add salt, pepper, and red pepper flakes and bring to boil. Add potatoes and cook until they’re done (about 15 minutes). Reduce heat and add roux and cheese. Stir until soup thickens and cheese melts, then add corn. Adjust seasonings as needed (add more red pepper flakes to make it spicier). Serve with sour cream, extra cheese, and crushed tortilla chips on top.


Tomato Basil Soup (huge batch)

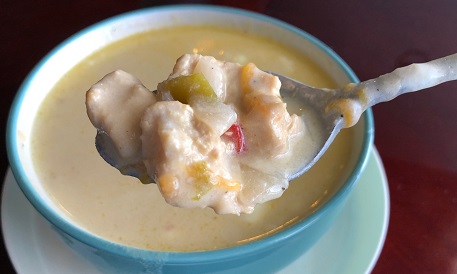
Oh man, this soup is so glorious and rich. It does take a fair amount of time and cream (probably one of the reasons it’s so delicious), so we’ll often look for cream to go on clearance and then freeze it for making this soup or ice cream in the future. This soup is adapted from a deli recipe at Harmons, so get out your scale for this recipe. I’m so glad the deli director at Harmons was always happy to share any recipe you’d ask for, because everything that Harmons makes is so amazing. I did adapt it to make it a little easier and cheaper for certain ingredients, and to add chicken and pasta. This soup is fantastic when served in a bread bowl or with bread in general–dip your bread in it. Or grilled cheese. Delicious. (Also try the Jalapeno Cheddar Soup recipe adapted from Harmons.)

You can add chicken and/or tortellini to the soup, which we usually do. Take note that this soup does require an immersion blender (unless you make a tiny batch and blend it up in your regular blender). We usually make a giant batch and freeze leftovers in gallon bags, so it always takes longer to make than I think. But it’s so worth it. And it’s wonderful to have in the freezer for an easy meal or in case a friend is sick and needs a quick meal.

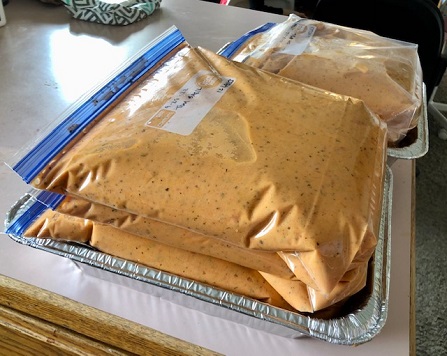
*This is purposely a huge recipe–we basically make it once or twice a year, fill several gallon bags (a single batch fills 3-4 gallon bags. If we double the recipe, we get 7-8 gallon bags), place them in metal disposable pans, freeze them in our large freezer, and eat them throughout the whole year.

If you’re making this gluten free, just don’t add the tortellini. You could potentially cook some gluten free pasta separately and put it in the bottom of each person’s bowl before adding the soup. But it’s pretty great as it is.

Make it a meal with:

  • Bread Bowls, French Bread, or Garlic Bread
  • Grapes or Jell-O
  • Green Salad

Tomato Basil Soup (huge batch)

  • Servings: About 45
  • Difficulty: medium-hard
  • Print


You need a scale and an immersion blender. Freeze leftovers in gallon bags.

Ingredients

  • 1/2 c. Olive Oil
  • 2 lb. Yellow Onions, diced (buy close to 3 lb.)
  • 2 oz. Garlic, minced
  • 2 oz. Salt
  • 0.6 oz. Ground Black Pepper
  • 6 c. Water
  • 3 lb. Fresh Tomatoes, cored and diced (buy a little over 4 lb.)
  • 2 large (102 oz.) cans Diced Tomato (I’ve also sliced whole tomatoes after Sam’s Club stopped carrying the large diced can)
  • 6-8 lbs. Chicken Breasts, cubed (optional) (like a pack of fresh chicken breasts from Sam’s Club)
  • 2.5 qt. Heavy Cream 
  • 2 lb. shredded Italian Cheese 
  • 2 c.+ Parmesan (like the cheap powdered parmesan)
  • 0.8+ oz. dried Basil
  • 40-60 oz. Frozen Tortellini (optional)

Directions

In a very large stock pot (at least 12 qt.), heat oil over medium heat. Sauté garlic, onions, salt, and pepper until translucent. Add water, fresh tomatoes, canned tomatoes, and basil. Bring to a boil, then reduce to a simmer, cooking for 40 minutes or until thickened. Remember to stir periodically, scraping the bottom so it doesn’t burn. If using chicken, cook the chicken in a separate large pan while the soup simmers, and keep the chicken separate until the end. Once the soup is thickened, add cream and cheeses. Puree with a stick blender. Add more cheese, salt, or basil to taste–I often add more of all–but remember that the basil flavor will get stronger as it sits. Add chicken and tortellini at end to heat through before serving. If your soup pot is really full, keep the chicken and tortellini separate and add them to the bottom of each person’s bowl before serving. Or divide the soup into two large pots and add the chicken and tortellini.
 
To freeze leftovers: Ladle two ladles full per person into a gallon bag. We usually do 12 ladles so we get a meal plus lunch the next day for our family of two adults and 3 small children. When we double the batch and use two giant pots, we get 7 or 8 gallon bags for the freezer after our dinner and lunch, depending how many leftovers we want in the fridge (if it’s a single batch, it’s about 3-4 gallon bags). Then we place the bags in disposable metal pans and take them to the freezer.
 
To reheat: Remove a bag from the freezer and let it thaw overnight or microwave it a few minutes to thaw it a little. It’s okay if it’s not totally thawed. Just get it thawed enough to get in a big pot or even an electric skillet if it’s really frozen and won’t fit in a pot. Heat until it’s your desired temperature. No need to add water or anything else.


Chicken Bacon Ranch Quesadillas

Jeff and I had our first date at Chili’s, so it’s always had a special place in my heart. I used to love getting their quesadilla explosion salad before I found out I have celiac. One day for a date night, I looked up ideas of how to make those quesadillas, stuffed with cheese, chicken, bacon, and ranch. I didn’t find an exact copy, but I’m quite happy with how these turned out, and we’ve had them a lot. They’re pretty easy if you’ve got pre-cooked chicken (such as from rotisserie chicken) and bacon. And Chili’s would serve them with shredded lettuce, pico de gallo, and sour cream, so that’s what we try to do if we can.

If you’re making this gluten free, just use corn tortillas and make yours either in a separate pan or make yours first before making any with flour tortillas. They still turn out great.

Make it a meal with:

Chicken Bacon Ranch Quesadillas

  • Servings: 6?
  • Difficulty: easy-medium
  • Print


Chili’s flavors, delicious with shredded lettuce, pico, and sour cream.

Ingredients

  • 1 pkg. Bacon, cut into pieces with scissors
  • 1-1.5 lbs. Chicken Breasts, sliced thin or Rotisserie Chicken pieces
  • Taco Seasoning to taste (optional)
  • Flour or Corn Tortillas
  • Shredded Cheddar or Mexican Cheese
  • Ranch Dressing
  • Optional: Shredded lettuce, pico de gallo or salsa, sour cream

Directions

In a heavy frying pan, cook the bacon pieces until crisp and then place on a paper towel lined plate. Remove the grease, then cook the chicken on high heat, adding taco seasoning to taste. Set chicken aside in a bowl. Wipe out the pan, then cook one side of two tortillas (or alternately you can use one tortilla to make a quesadilla, but fold it in half). When the tortillas are crisp but not dark, flip one over and set one aside. Place a handful of cheese on the one in the pan, then squirt ranch dressing in a spiral on top of the cheese. Add several chunks of chicken, then sprinkle bacon pieces over top. Sprinkle another handful of cheese over all, then place the reserved tortilla with the uncooked side up. Then carefully flip the whole thing so the uncooked side of the tortilla cooks. When the quesadilla is done, place on a cutting board and cut into four pieces. Serve with shredded lettuce, pico de gallo, and sour cream.


Sweet Pork

This sweet pork comes from Mel’s Kitchen Cafe, and is a lot like Cafe Rio’s. It’s amazing, and we’ve made it for several large group events and birthday parties. Plus, pork shoulder is often on sale for 99 cents, so the meat is surprisingly cheap (although the sauces make it more costly).

It makes a lot, and we usually freeze the leftovers in quart bags to use in the future. You can use the sweet pork to make into sweet pork burritos or salad.

Make it a meal with:

And luckily this one is naturally gluten free.

Sweet Pork

  • Servings: A LOT
  • Difficulty: medium
  • Print


Great for big gatherings, and it freezes well.

Ingredients

Seasoning

  •  1 Tbsp. cumin
  •  1 Tbsp. Paprika
  •  1 Tbsp. Onion Powder
  •  1 Tbsp. Chili Powder
  •  1 Tbsp. Garlic Powder
  •  2 tsp. Salt
  •  1/2 tsp. Black Pepper

Pork

  •  3-5 lbs. Pork Shoulder (or boneless sirloin pork roast, but it’s not as good)
  •  1 c. Root Beer or Cola
  •  1 c. Green Salsa (aka salsa verde. Herdez is great, but use Mild–medium is surprisingly hot)

Sauce

    •  2 c. Red Enchilada Sauce (Rosarita is good)
    •  1/2 c. Brown Sugar
    •  8 oz. Chopped Green Chiles
    •  1 c. Green Salsa

Directions

For seasoning: Combine all the seasoning ingredients together in a small bowl. Measure out 2 Tbsp. of the mixture and save for later. Cut the pork roast into large chunks (4-6 inches) and rub the remaining seasoning mixture (not the reserved 2 Tbsp.) evenly over all sides of the pork.

For pork: Add the soda and green salsa to the slow cooker. Stir to combine. Add the seasoned pork. Cover and cook on low for 8-9 hours or high for 5-6 hours until tender. Transfer the pork to a cutting board or pan and shred. Discard all but 1/2 cup of the cooking liquid in the slow cooker, then add the shredded pork back.

For sauce: To the pork in the slow cooker, add the 2 tablespoons of reserved spices and the rest of the sauce ingredients, then stir to combine. Cover and cook on high for 15-20 minutes until heated through.